利用github+Cloudflare搭建网站监控页面
一、准备
1.Cloudflare 帐户(免费计划就足够了,无需信用卡)
2.要运行 Actions to deploy 的 GitHub 帐户
3.域名(不是必须的,二级也可以。)
二、基础配置
要在 Cloudflare 上设置您自己的 Uptimeflare:
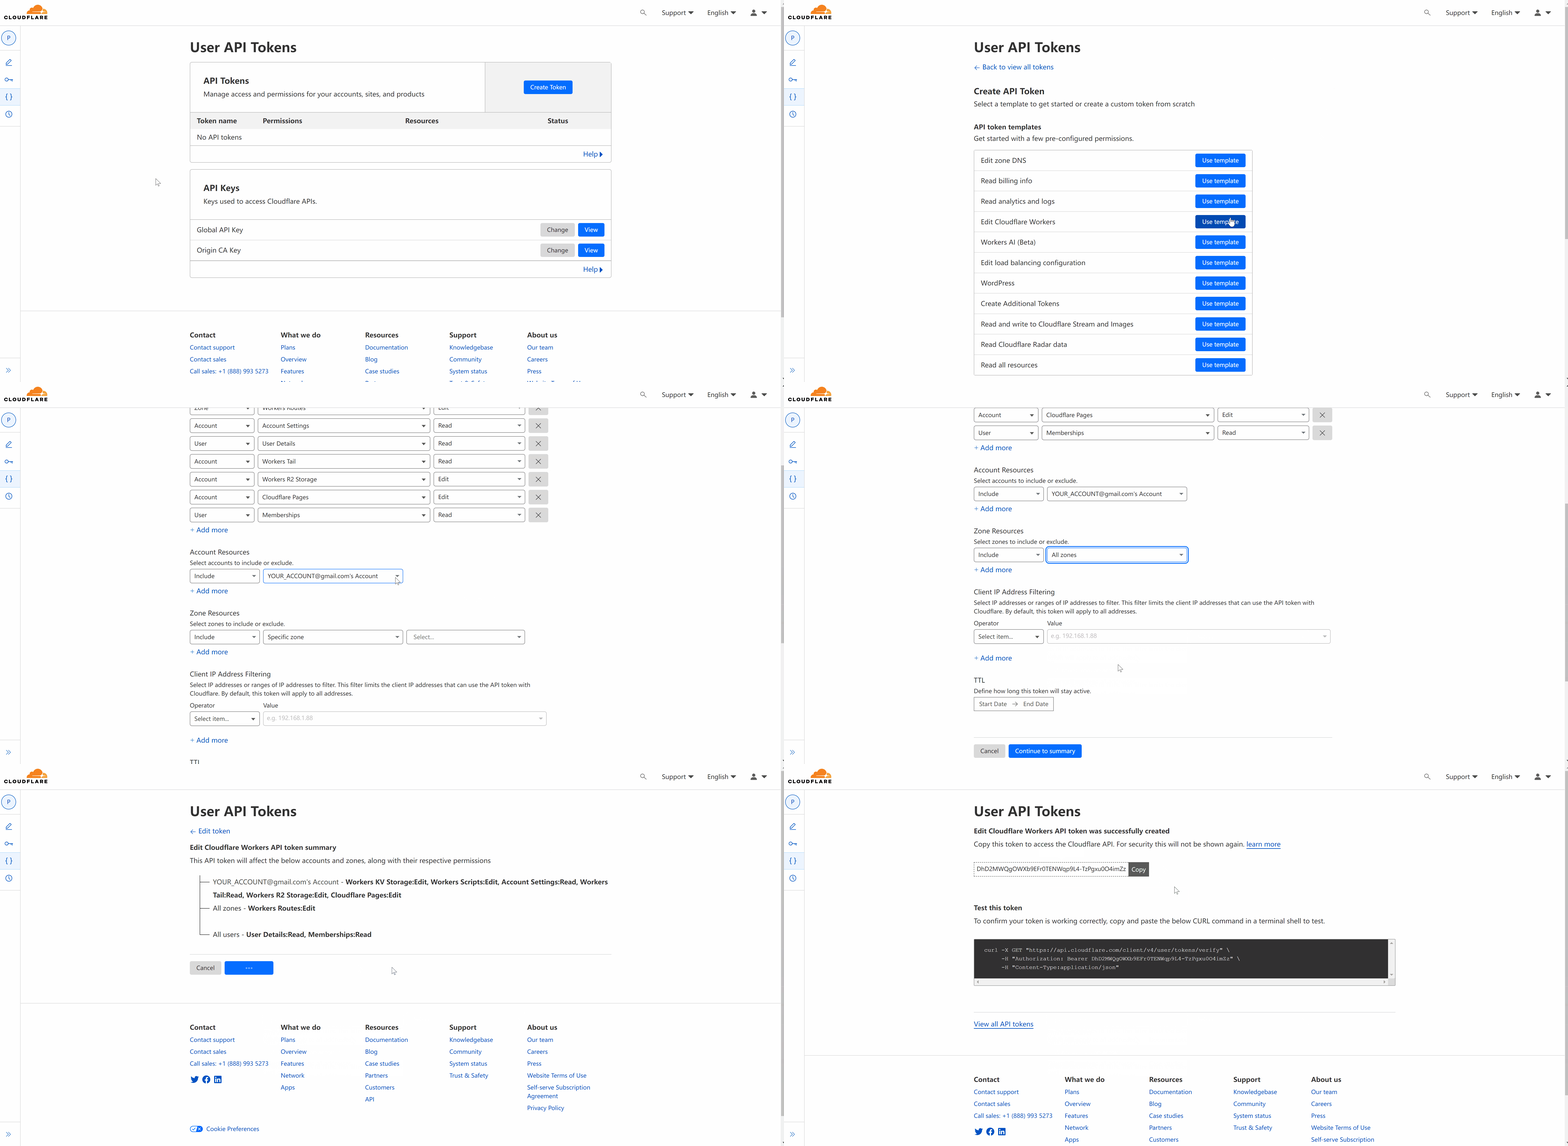
1.使用 Edit Cloudflare Workers template 在 https://dash.cloudflare.com/profile/api-tokens 创建 API 令牌。
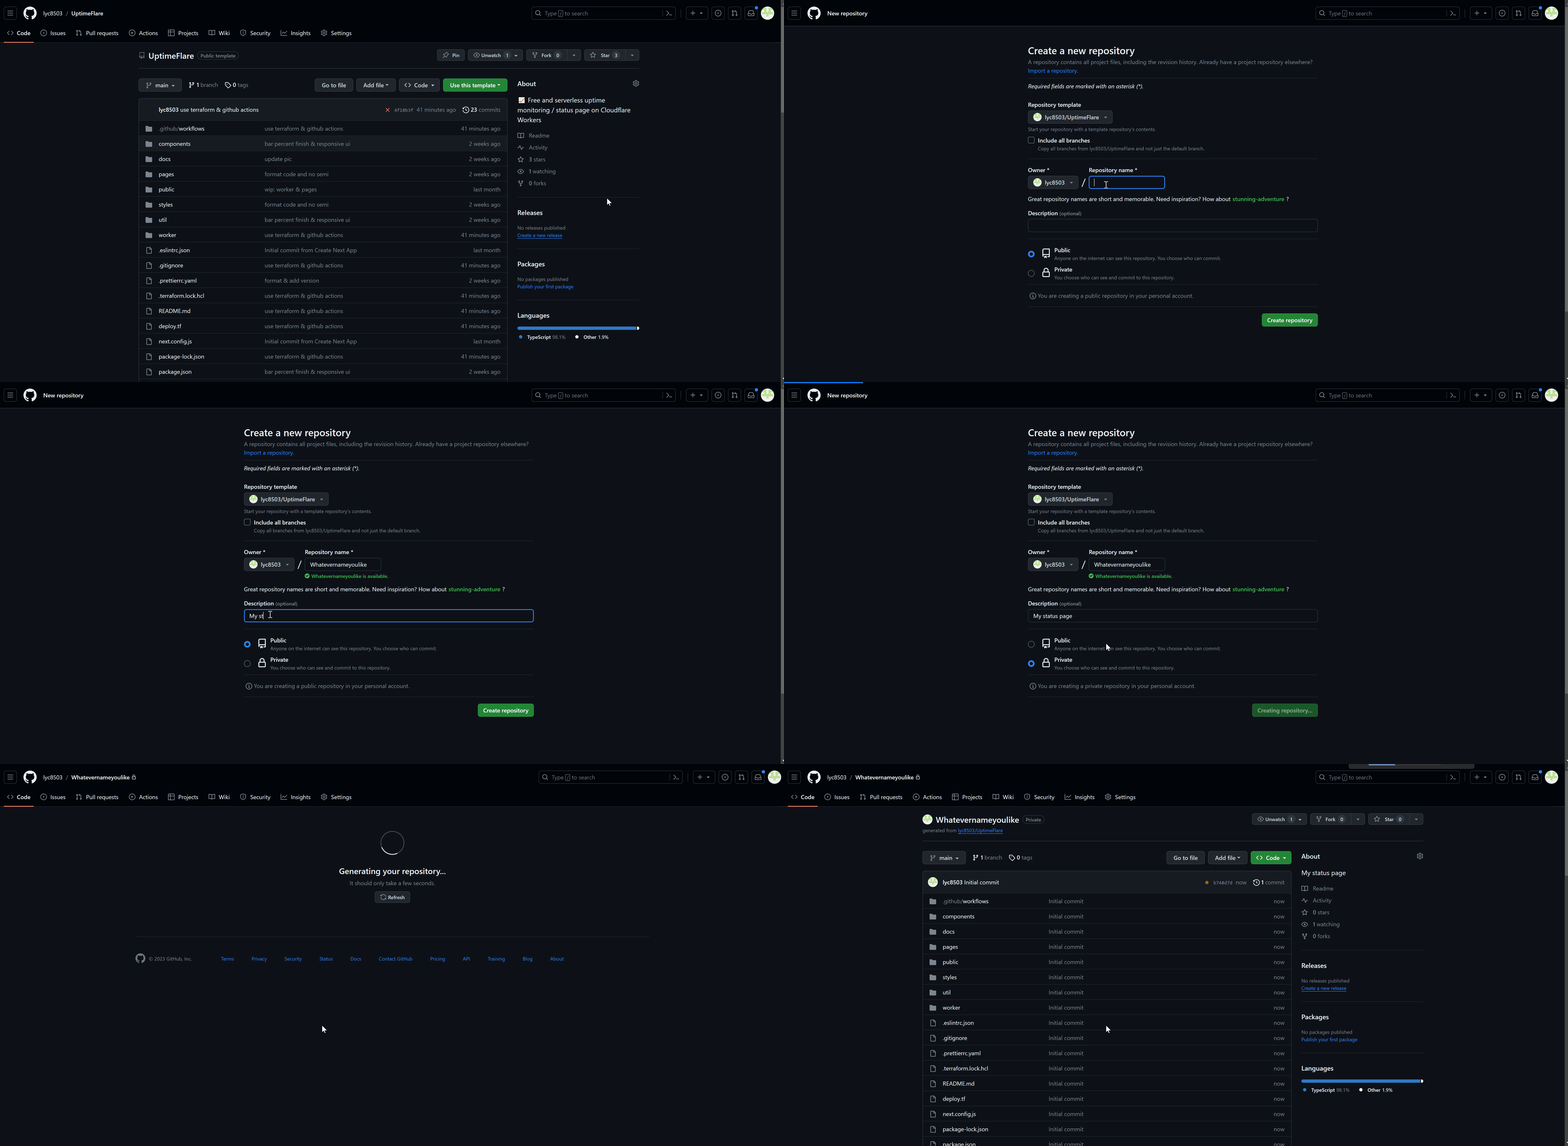
2.通过单击 Use this template 在您的帐户中创建此存储库的副本。(可选)如果您不希望其他人查看您的监视器定义,请将其设为私有。(你可以直接在那里包含 token)。

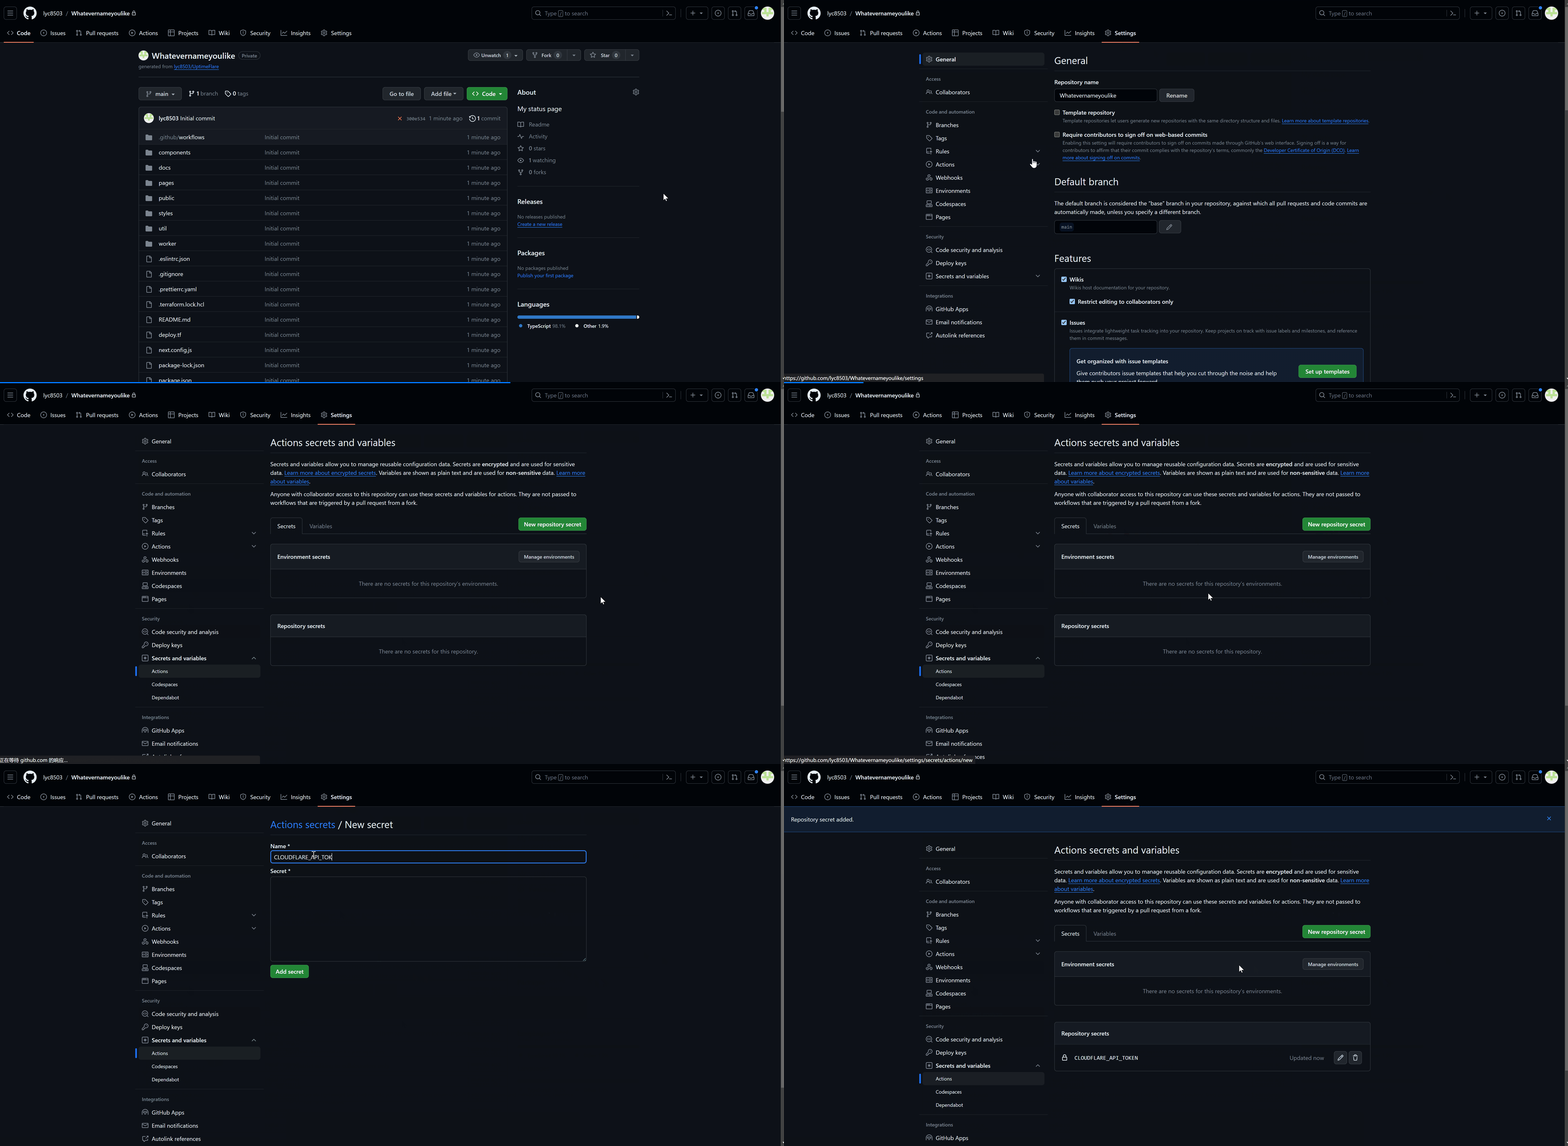
3.在 Settings - Secrets and variables - Actions 中设置您的 Cloudflare API 令牌,设置一个密钥,其密钥为 CLOUDFLARE_API_TOKEN ,值是您在步骤 1 中获得的令牌。您的令牌将由 GitHub 安全存储。
4.编辑 uptime.config.ts 文件(位于 YOUR OWN repo 的根目录)以定义监视器并自定义状态页面,请参阅文档以获取更详细的说明。
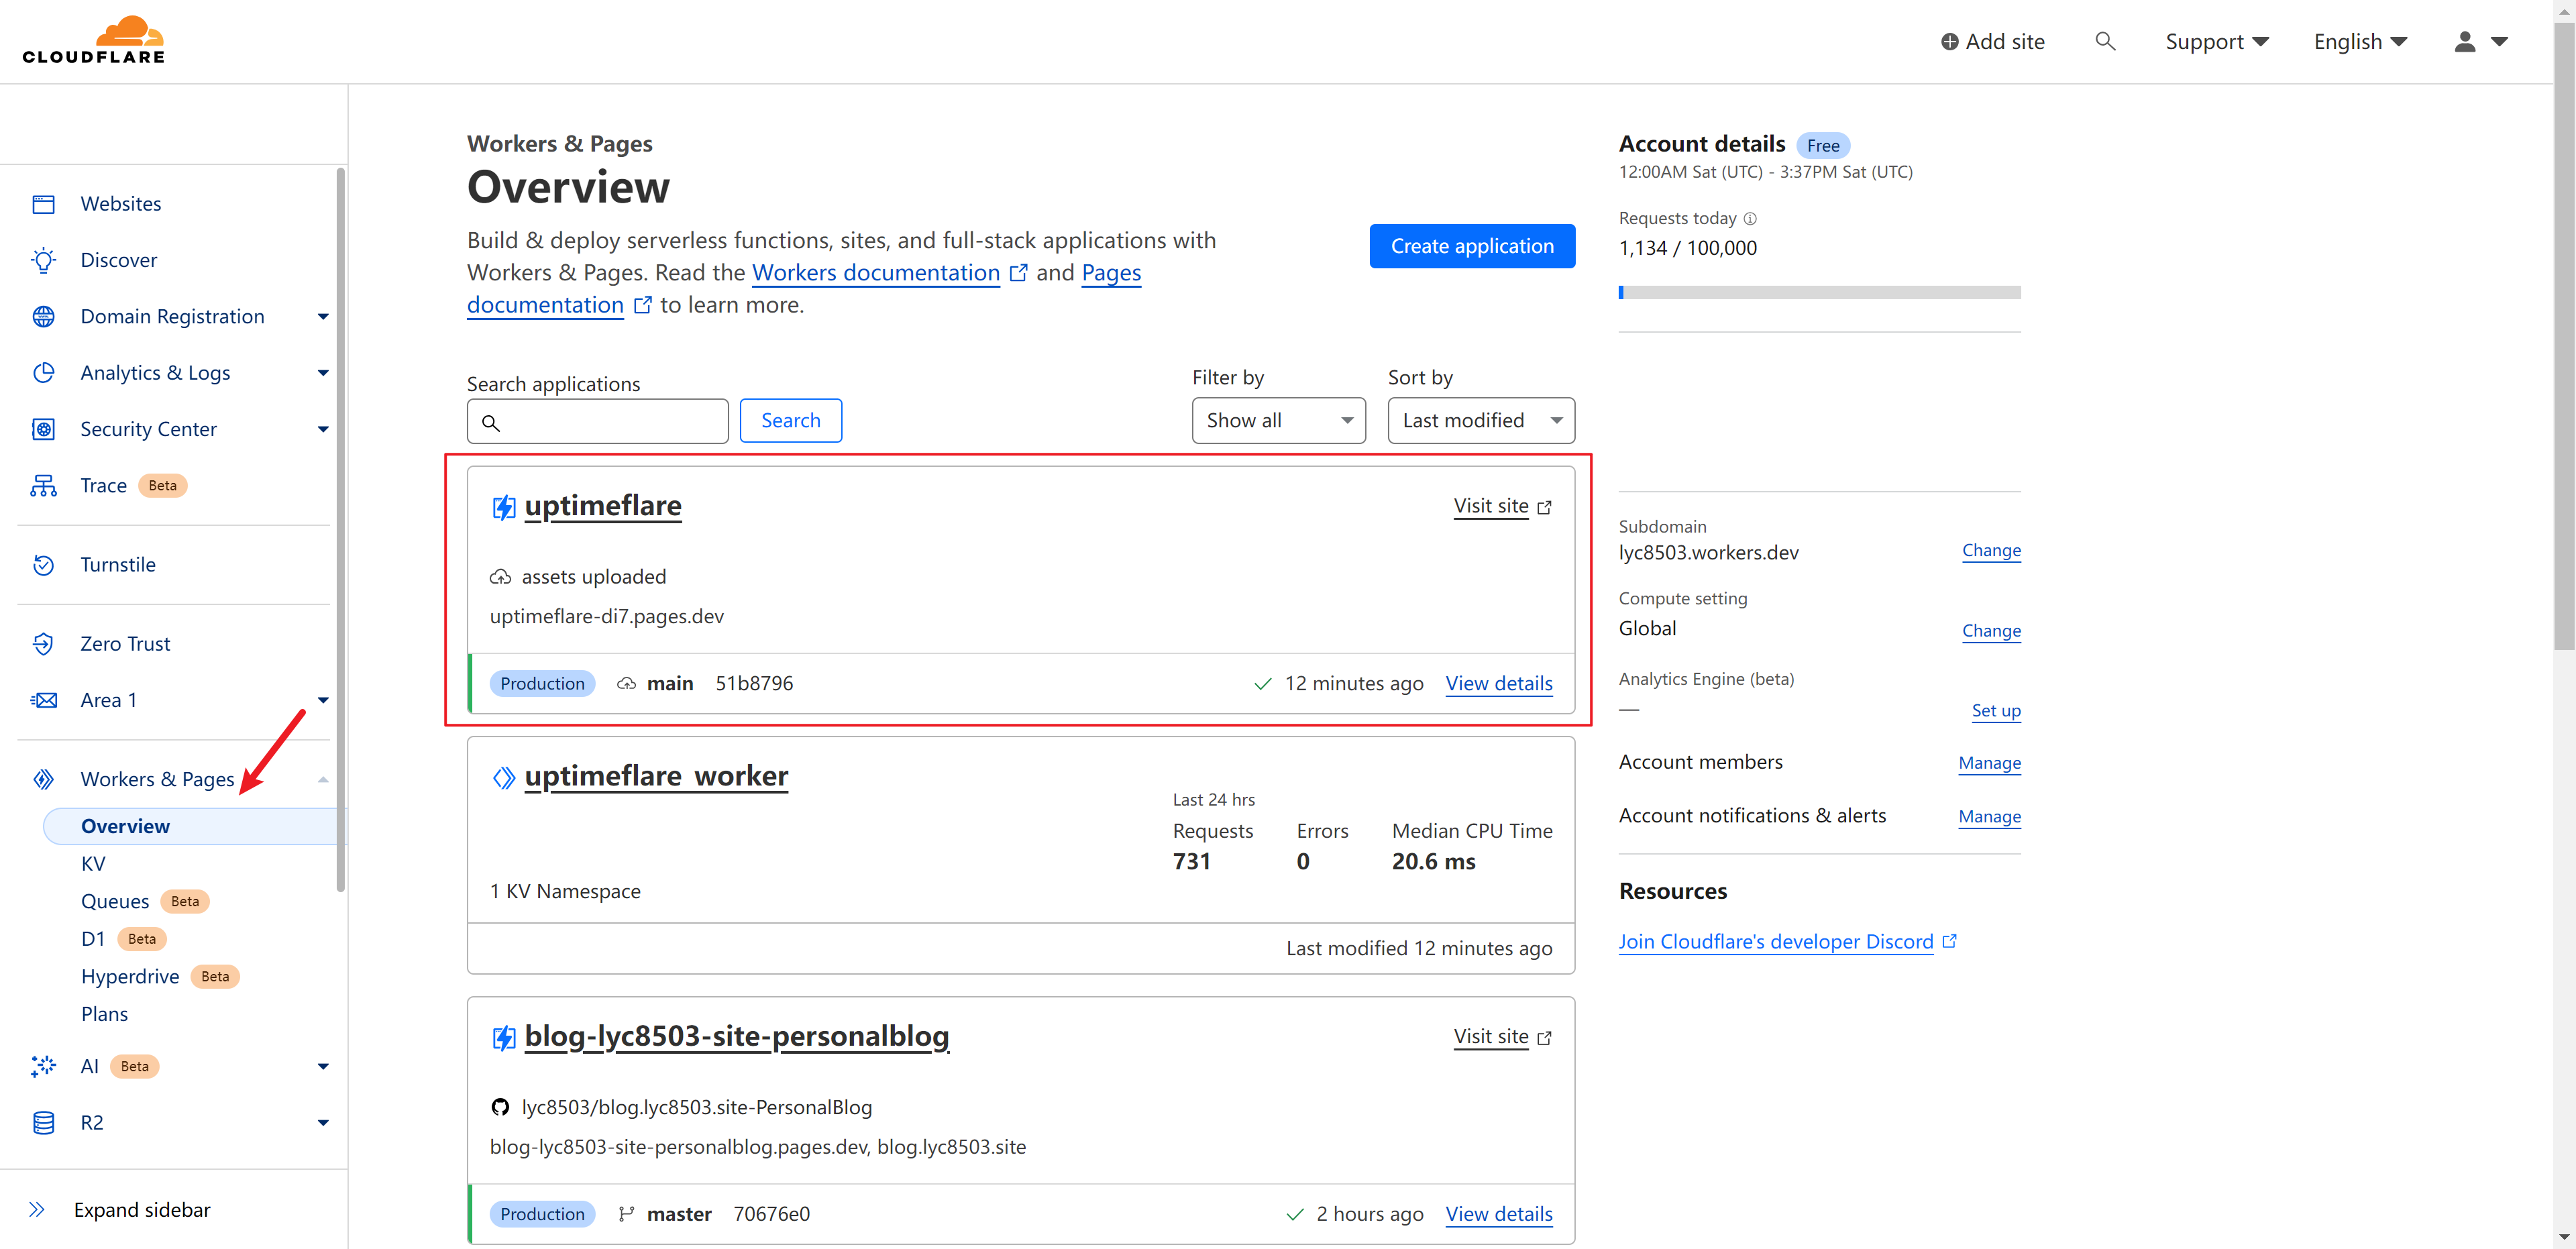
5.要稍后更新或修改您的配置,只需再次编辑 uptime.config.ts 即可。如果您的配置正确,管道将获取您的更改并自动将其应用于您的 Cloudflare Pages。
二、Configuration 配置
UptimeFlare 的所有配置都在 uptime.config.ts 文件中完成,从模板创建自己的 UptimeFlare 存储库后,您需要在存储库中修改 以 uptime.config.ts 定义所需的监控和其他配置。
它是一个 typescript 文件,但用作配置文件时,它类似于 JSON。
模板中提供的 uptime.config.ts 文件是最新的完整配置,通常情况下,你不需要使用所有选项,下面我将解释一些常用的配置,并提供一个更简单的配置作为参考。
PageConfig 页面配置
PageConfig 主要是 status 页面相关的配置项,包括状态页面的标题,以及状态页面右上角的链接。
这些配置实际上就是这样,根据需要修改它们!
const pageConfig = {
  title: "lyc8503's Status Page",
  links: [
    { link: 'https://github.com/lyc8503', label: 'GitHub' },
    { link: 'https://blog.lyc8503.site/', label: 'Blog' },
    { link: 'mailto:me@lyc8503.site', label: 'Email Me', highlight: true },
  ],
}
WorkerConfig WorkerConfig 配置
WorkerConfig 主要用于 worker 中进行监控,主要的监控器在 monitors 数组中定义。
notification 包含发送通知相关的配置,如果您需要在监控状态发生变化时收到通知,请参阅设置通知。
通常,您不需要更改 kvWriteCooldownMinutes 和 callbacks ,只需将它们保留为默认值即可。
如果您想将状态页面设为私有(当然,这是可选的),您可以通过提供 passwordProtection 来设置用户名和密码。
const workerConfig = {
  kvWriteCooldownMinutes: 3,
  passwordProtection: 'username:password',
  monitors: [
    {
      id: 'foo_monitor',
      name: 'My API Monitor',
      method: 'GET',
      target: 'https://www.google.com'
    },
    {
      id: 'test_tcp_monitor',
      name: 'Example TCP Monitor',
      method: 'TCP_PING',
      target: '1.2.3.4:22'
    },
    // You can continue to define more monitors here...
  ],
  notification: {
    //...
  },
  callbacks: {
    //...
  },
}
单个监视器的完整配置如下,如果您不知道字段的用途,请不要包含它!
{
  // `id` should be unique, history will be kept if the `id` remains constant
  id: 'foo_monitor',
  // `name` is used at status page and callback message
  name: 'My API Monitor',
  // `method` should be a valid HTTP Method or "TCP_PING" for TCP port monitor
  method: 'POST',
  // `target` is a valid URL for HTTP or hostname:port for TCP
  target: 'https://example.com',
  // [OPTIONAL] `tooltip` is ONLY used at status page to show a tooltip
  tooltip: 'This is a tooltip for this monitor',
  // [OPTIONAL] `statusPageLink` is ONLY used for clickable link at status page
  statusPageLink: 'https://example.com',
  // [OPTIONAL] `expectedCodes` is an array of acceptable HTTP response codes, if not specified, default to 2xx
  expectedCodes: [200],
  // [OPTIONAL] `timeout` in millisecond, if not specified, default to 10000
  timeout: 10000,
  // [OPTIONAL] headers to be sent with HTTP monitor
  headers: {
    'User-Agent': 'Uptimeflare',
    Authorization: 'Bearer YOUR_TOKEN_HERE',
  },
  // [OPTIONAL] body to be sent with HTTP monitor
  body: 'Hello, world!',
  // [OPTIONAL] if specified, the HTTP response must contains the keyword to be considered as operational.
  responseKeyword: 'success',
  // [OPTIONAL] if specified, the check will run in your specified region,
  // refer to docs https://github.com/lyc8503/UptimeFlare/wiki/Geo-specific-checks-setup before setting this value
  checkLocationWorkerRoute: 'https://xxx.example.com',
},
Complete config 完成配置
const pageConfig = {
  title: "lyc8503's Status Page",
  links: [
    { link: 'https://github.com/lyc8503', label: 'GitHub' },
    { link: 'mailto:me@lyc8503.site', label: 'Email Me', highlight: true },
  ],
}

const workerConfig = {
  kvWriteCooldownMinutes: 3,
  passwordProtection: 'username:password',
  monitors: [
    {
      id: 'google_monitor',
      name: 'My Google Monitor',
      method: 'GET',
      target: 'https://www.google.com'
    },
    {
      id: 'ssh_monitor',
      name: 'Example SSH Monitor',
      method: 'TCP_PING',
      target: '1.2.3.4:22'
    },
  ],
  callbacks: {
    onStatusChange: async (
      env: any,
      monitor: any,
      isUp: boolean,
      timeIncidentStart: number,
      timeNow: number,
      reason: string,
    ) => {
      // This callback will be called when there's a status change for any monitor
      // Write any Typescript code here

      // This will not follow the grace period settings and will be called immediately when the status changes
      // You need to handle the grace period manually if you want to implement it
    },
    onIncident: async (
      env: any,
      monitor: any,
      timeIncidentStart: number,
      timeNow: number,
      reason: string,
    ) => {
      // This callback will be called EVERY 1 MINTUE if there's an on-going incident for any monitor
      // Write any Typescript code here
    },
  },
}

// Don't forget this, otherwise compilation fails.
export { pageConfig, workerConfig }
注:文章转载自https://github.com/lyc8503/UptimeFlare作者:lyc8503
作者为英文版,本人进行了半汉化处理,可复制https://github.com/Akihie/web-monitoring仓库进行部署。
演示地址:ip.nai.ge